
VTEX

What is VTEX?
VTEX is an ecommerce platform and cloud commerce solution that allows companies to create and manage highly personalized and scalable online stores. This platform offers a wide range of features and tools for product management, payment processing, logistics, and personalized shopping experiences. VTEX is used worldwide and is known for its focus on omnichannel commerce and its ability to adapt to the needs of companies of all sizes and sectors.
VTEX integration guide
To integrate OrkestaPay with the VTEX platform, it is necessary to follow these steps:
1 - Register an account
You must have a merchant account in OrkestaPay to carry out the integration.
2 - Copy integration credentials
Once you have registered your account, go to the Developers section found as an option in the side menu.
You must copy and save the credentials shown on screen, as you will need to enter them in the plugin configuration screen later.

3 - Webhook configuration
It is necessary to configure a webhook to notify VTEX of completed payments. To do this you can follow our Webhook configuration guide, however it is important to note that the URL that must be entered during the configuration is like the following: https://vtex-connector.orkesta.io/webhook/{vtex_account_name}
Where you must replace {vtex_account_name} with your merchant's account name.
4 - Payment connector configuration
4.1 - Provider configuration
Within your VTEX merchant administration portal, select the option Store Settings > Payment > Providers.
Click the top button "New provider" and enter the name "Orkesta" in the modal window search box, then select the only result shown from the list.
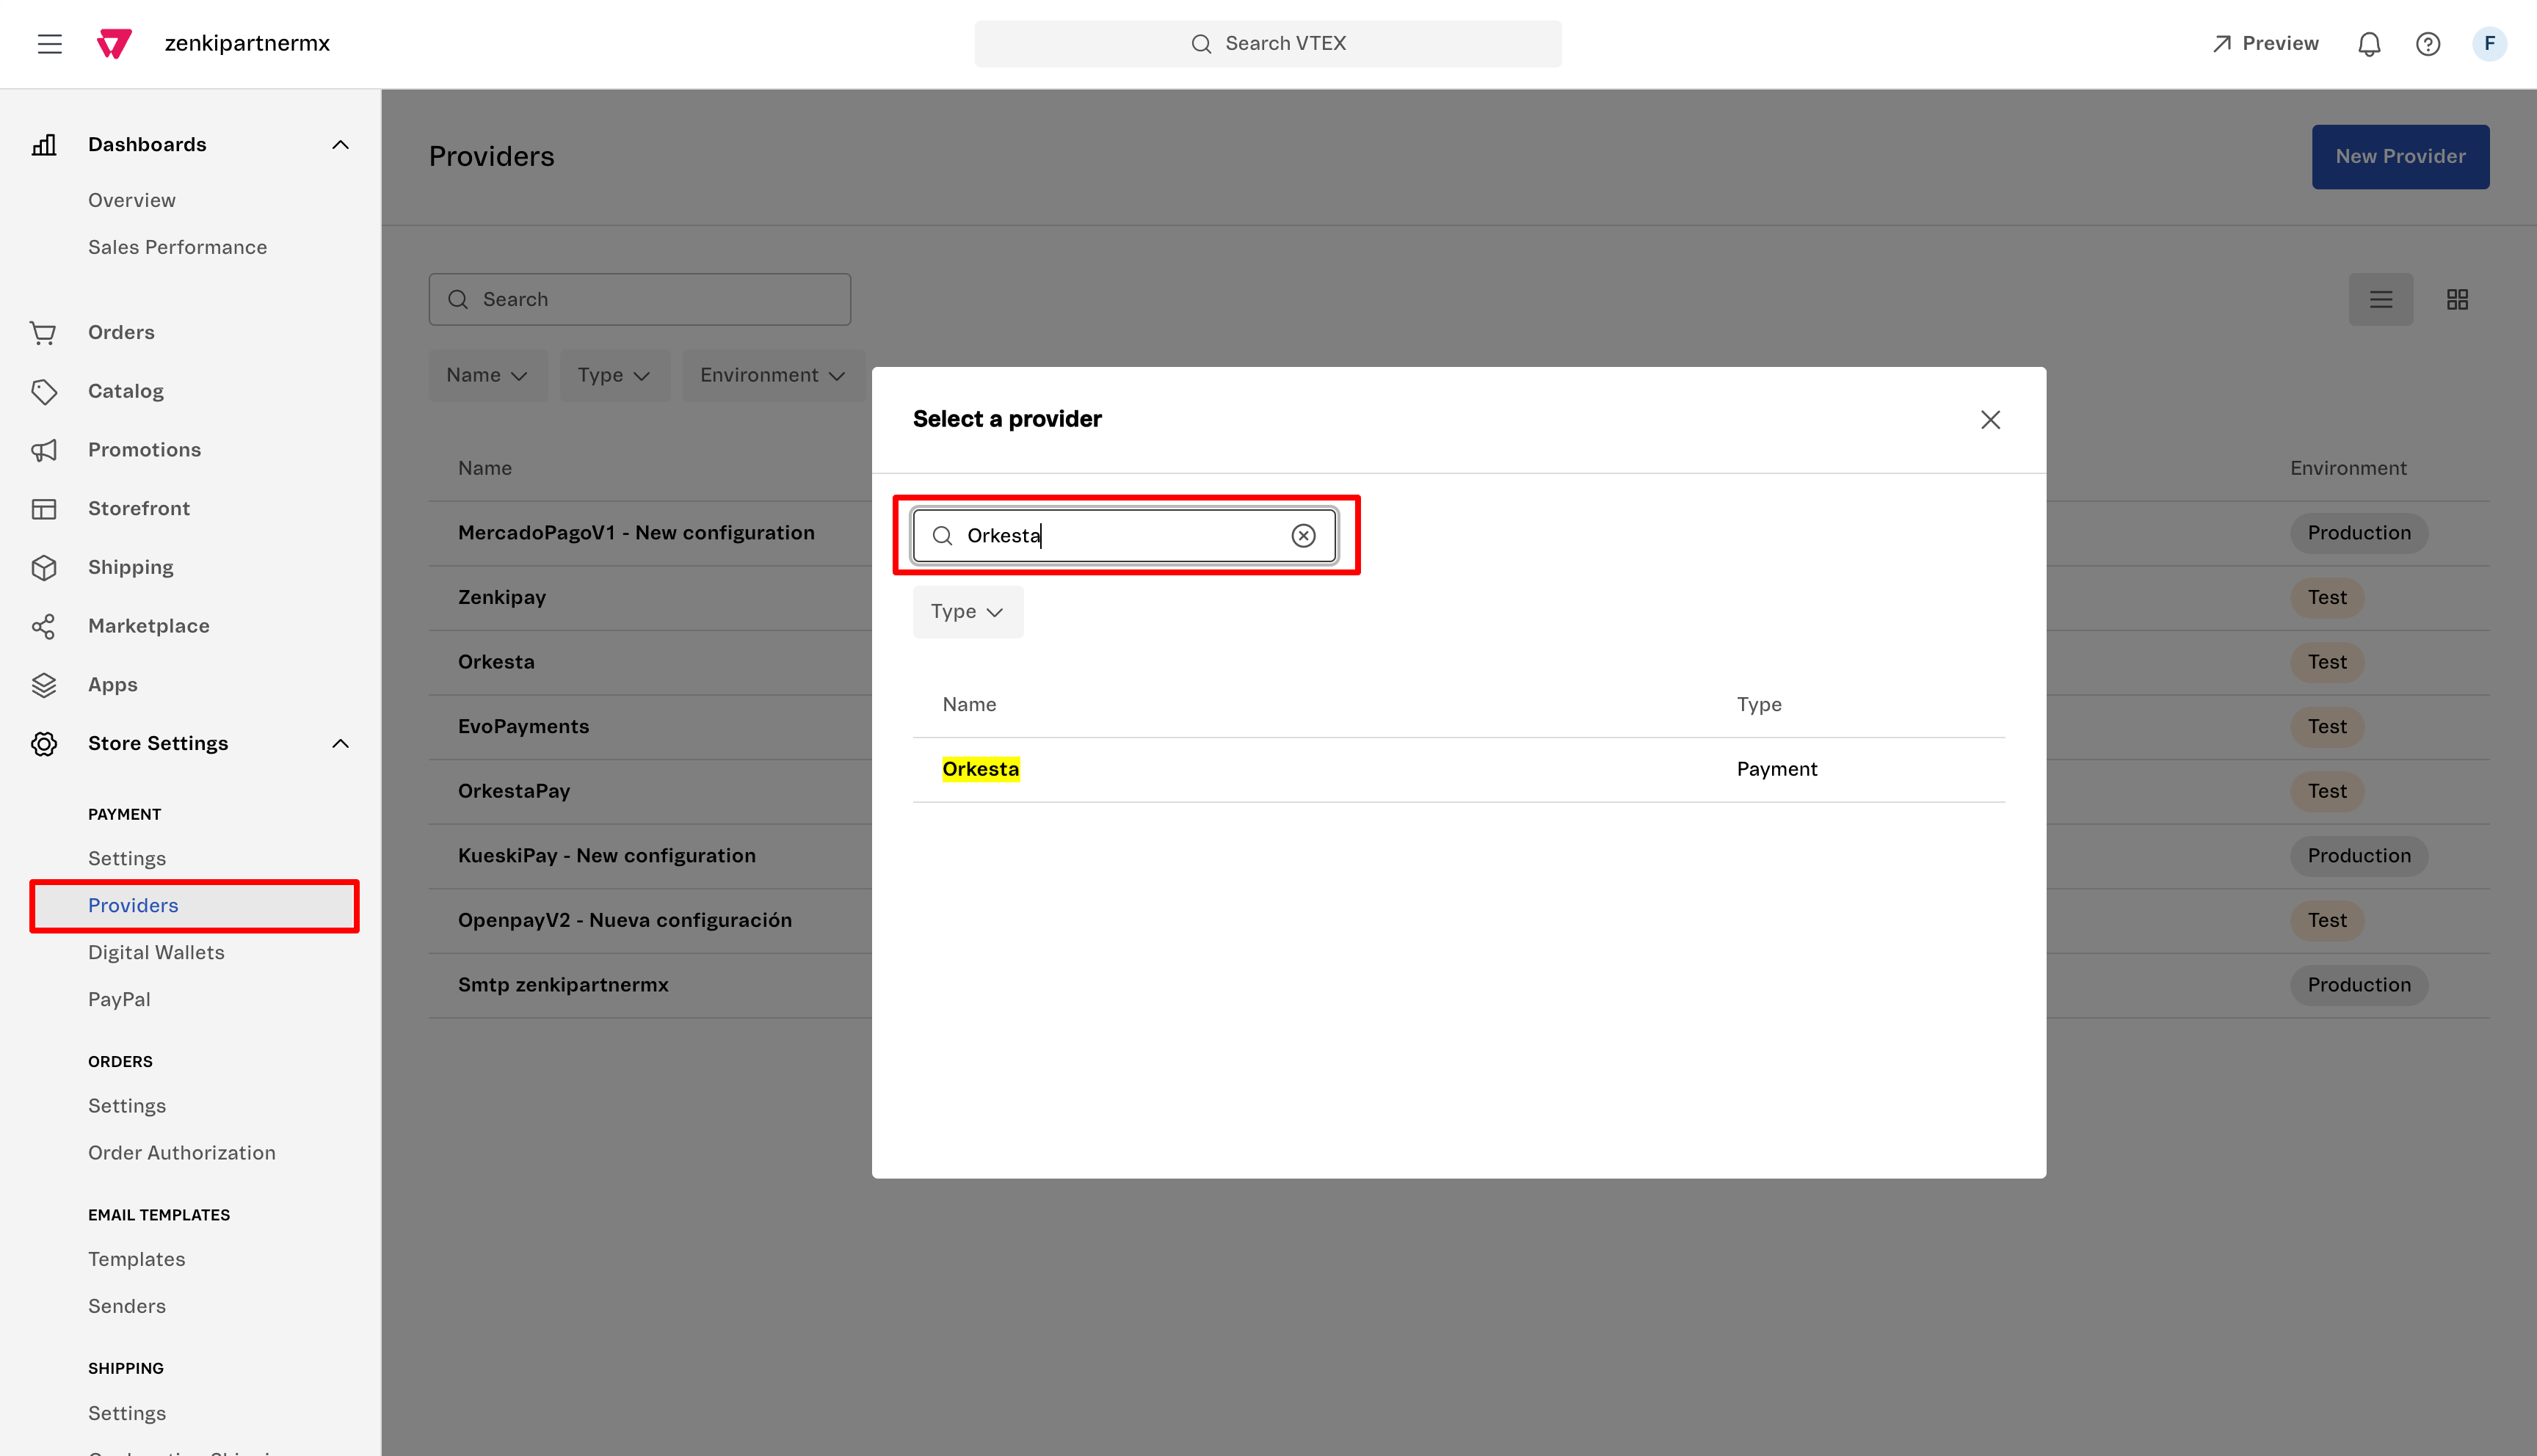
The payment connector configuration screen will be displayed where you must enter the data obtained from the OrkestaPay portal:
- Application key: Enter the "Access key" obtained from the OrkestaPay portal
- Application token: Enter the "Secret key" obtained from the OrkestaPay portal
- Webhook signing secret: Enter the "Secret key" obtained when configuring a webhook
Click the Save button.
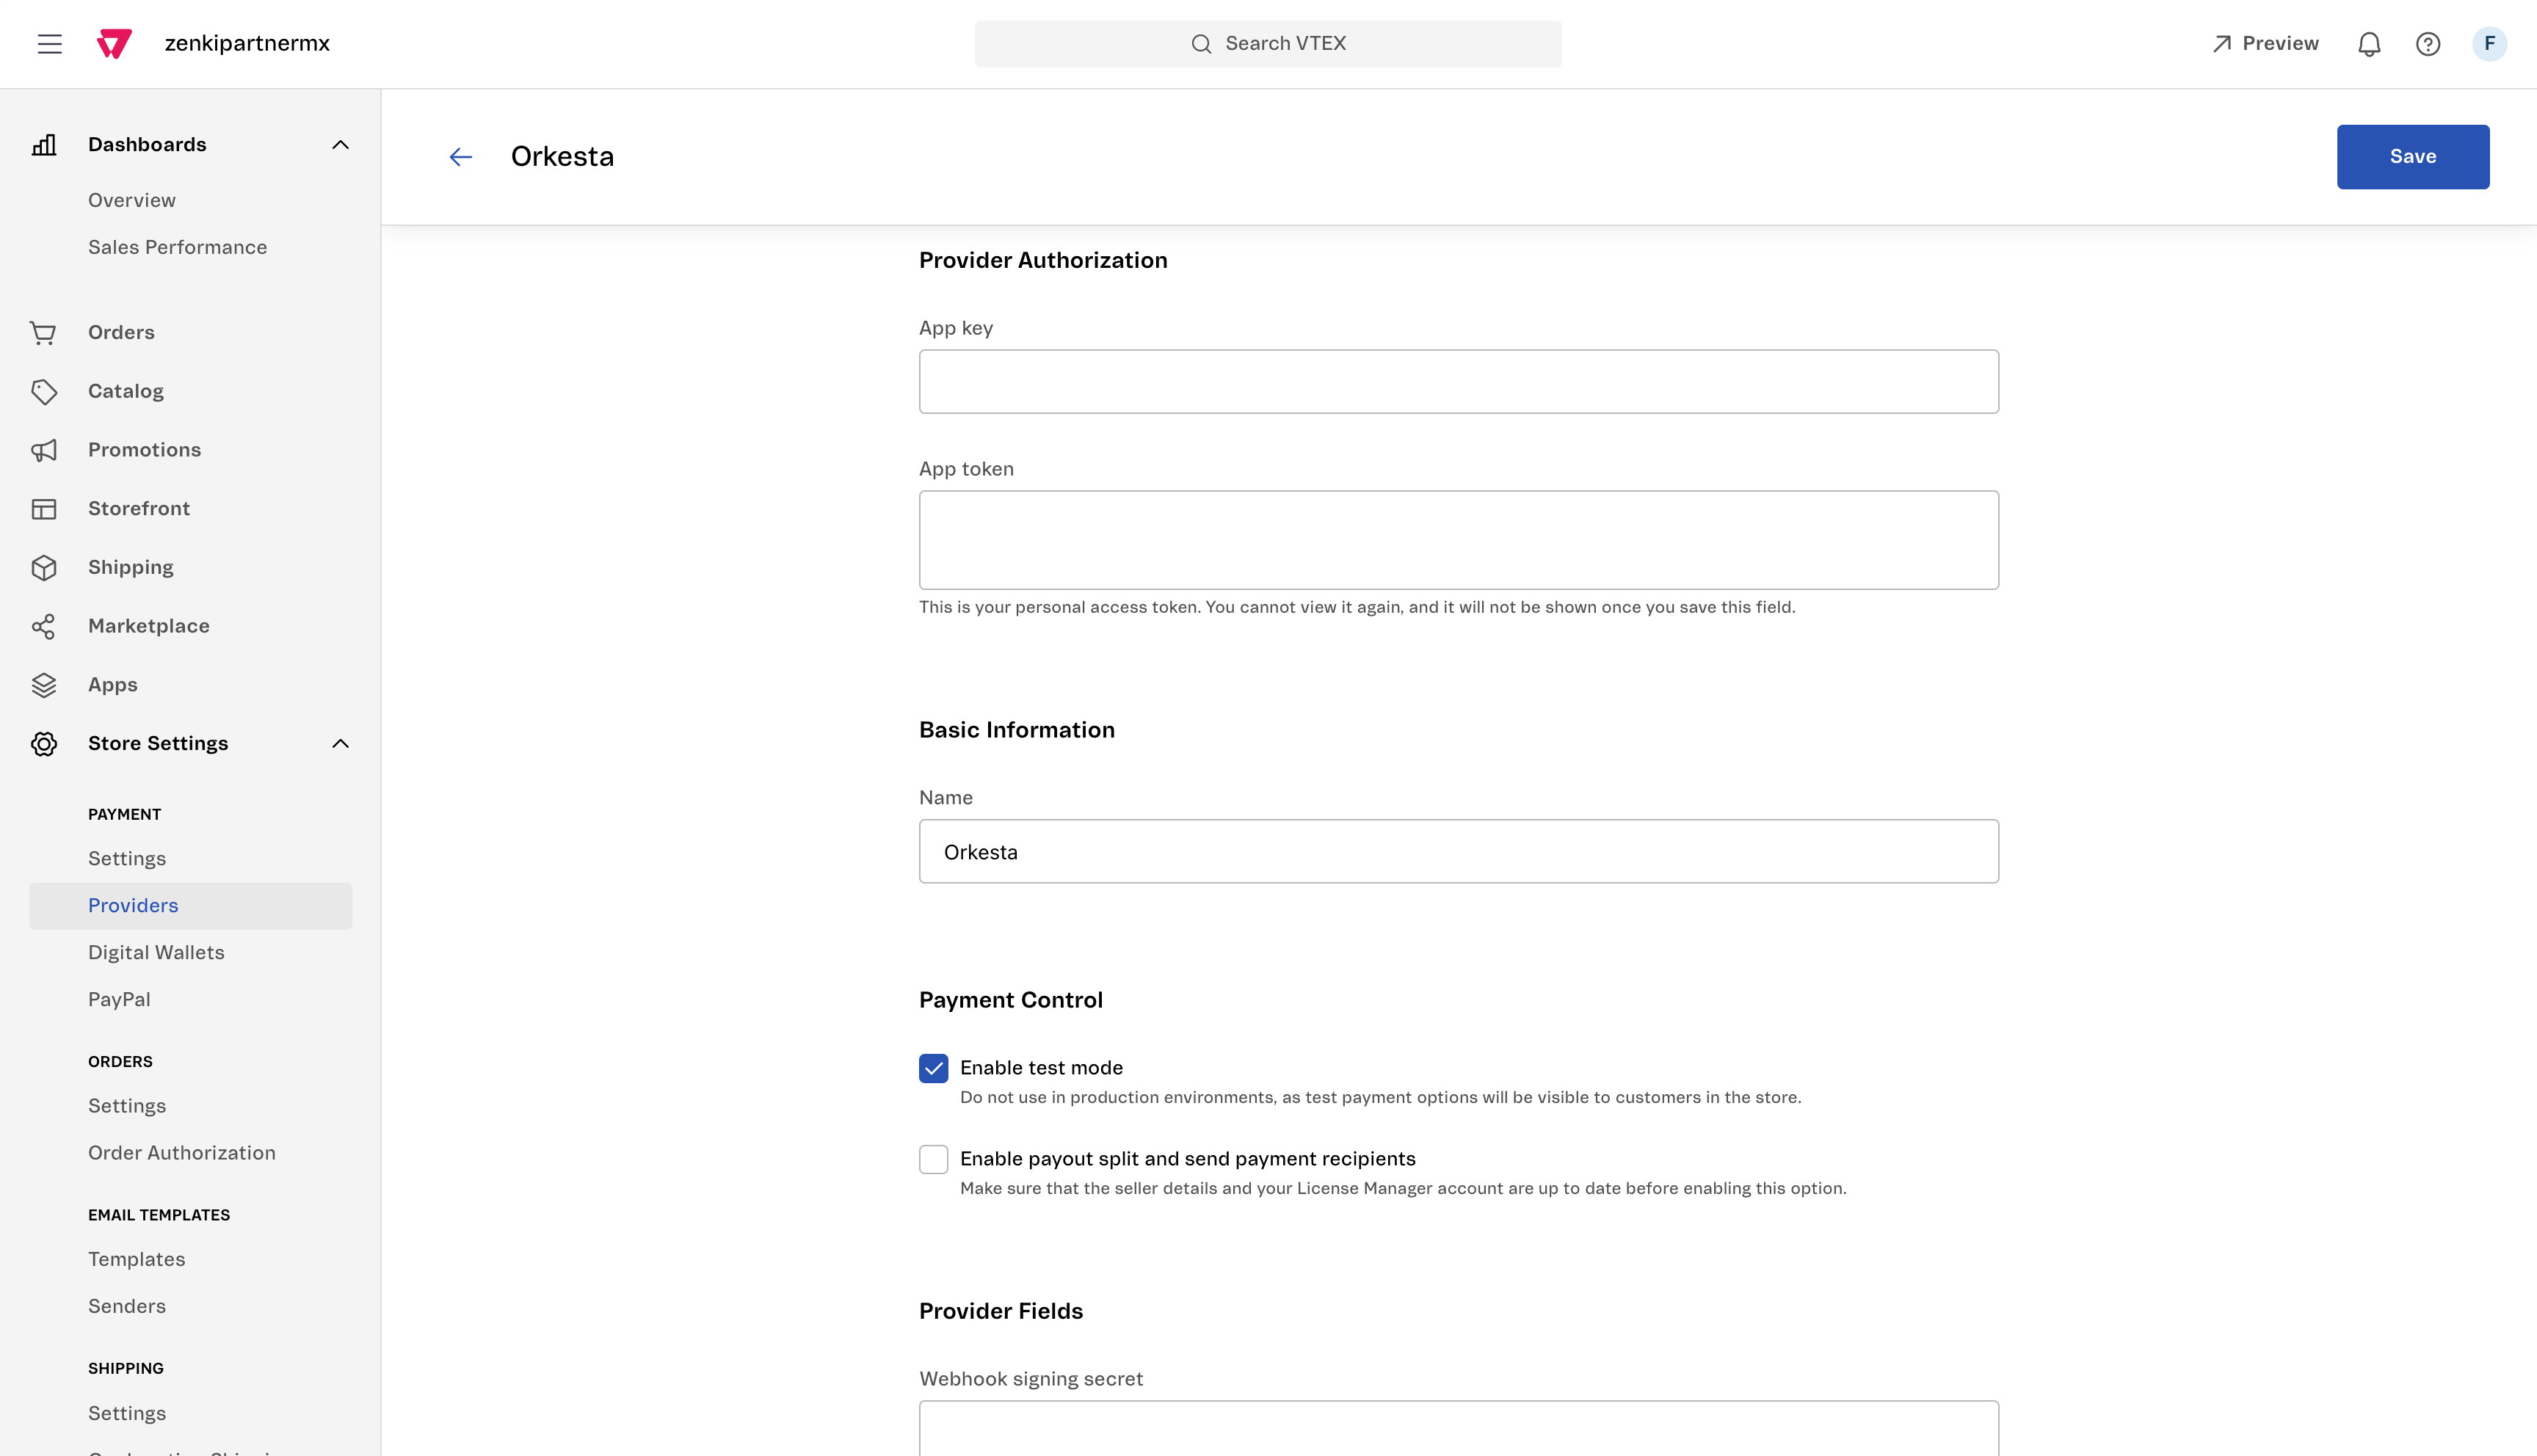
Connector mode
If you want to perform integration tests, enable the "Enable test mode" option. Verify that the connector mode and the entered keys correspond to the desired operating mode.
4.2 - Payment Conditions configuration
Within your VTEX merchant administration portal, select the option Store Settings > Payment > Settings.
Click the green button in the upper right to link the OrkestaPay connector with a credit card payment method. The following are currently supported: American Express, Visa, Visa Electron, Master Card, Master Card Debit, Diners, Discover, and JCB.
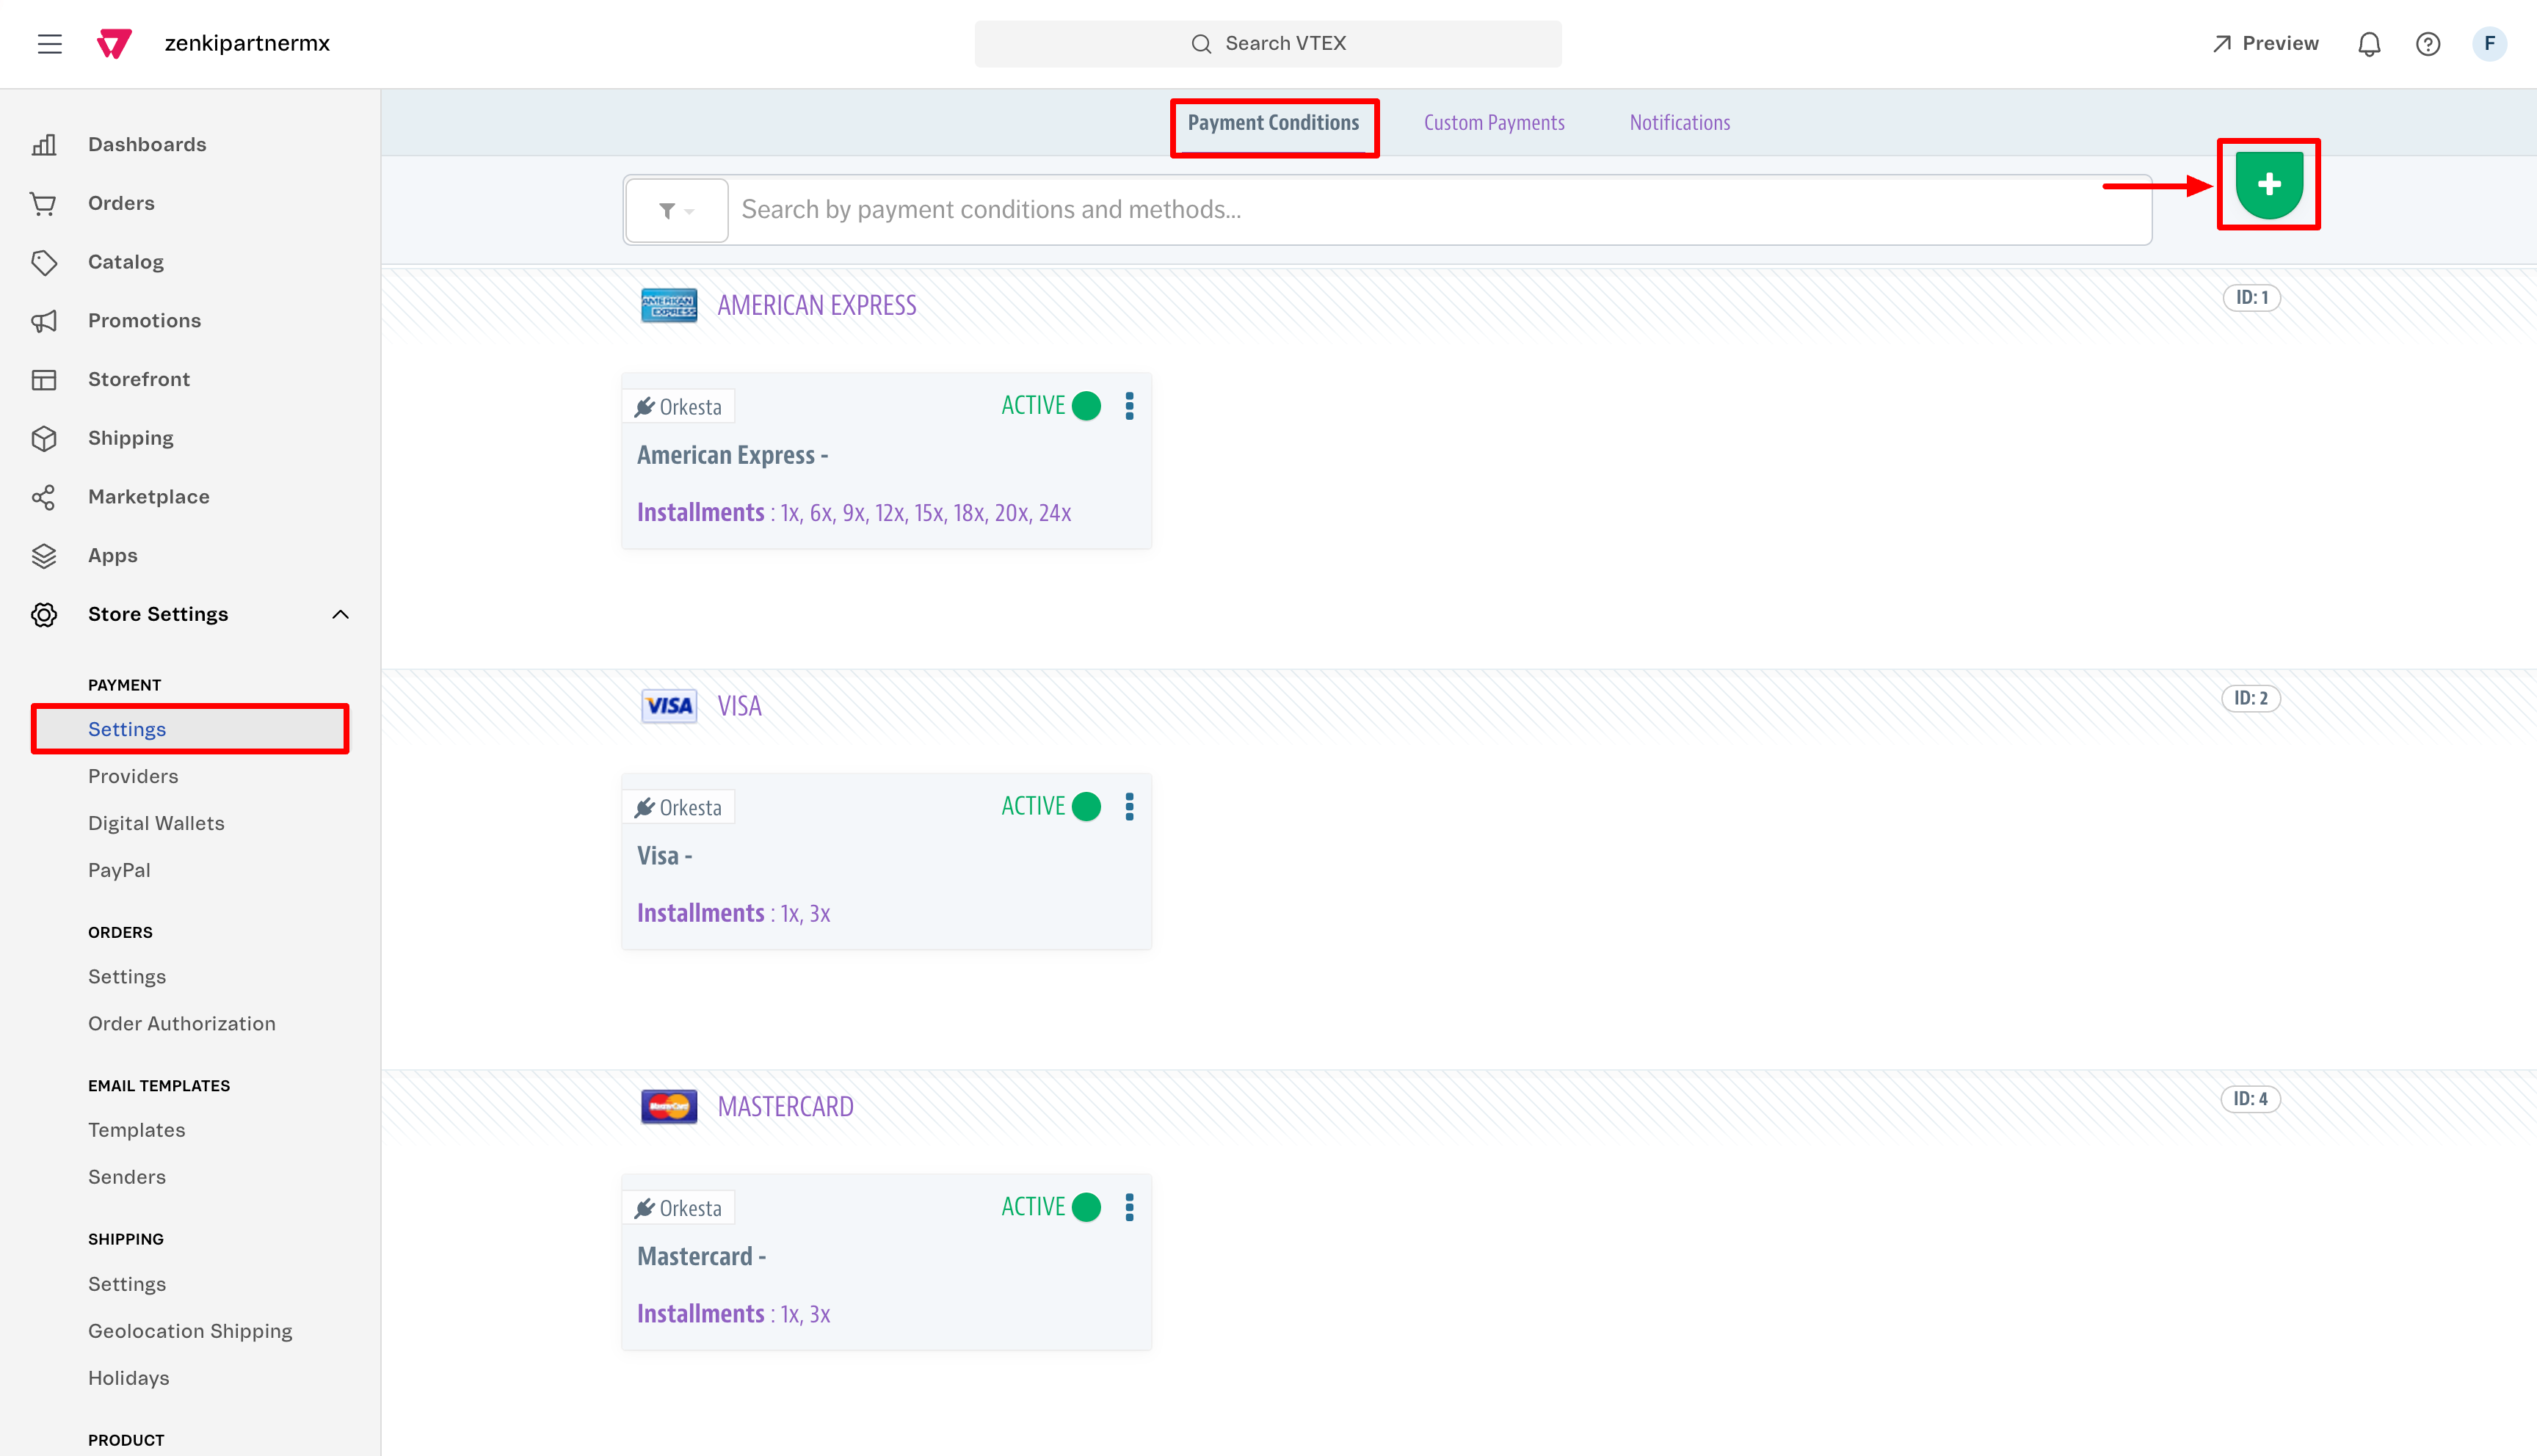
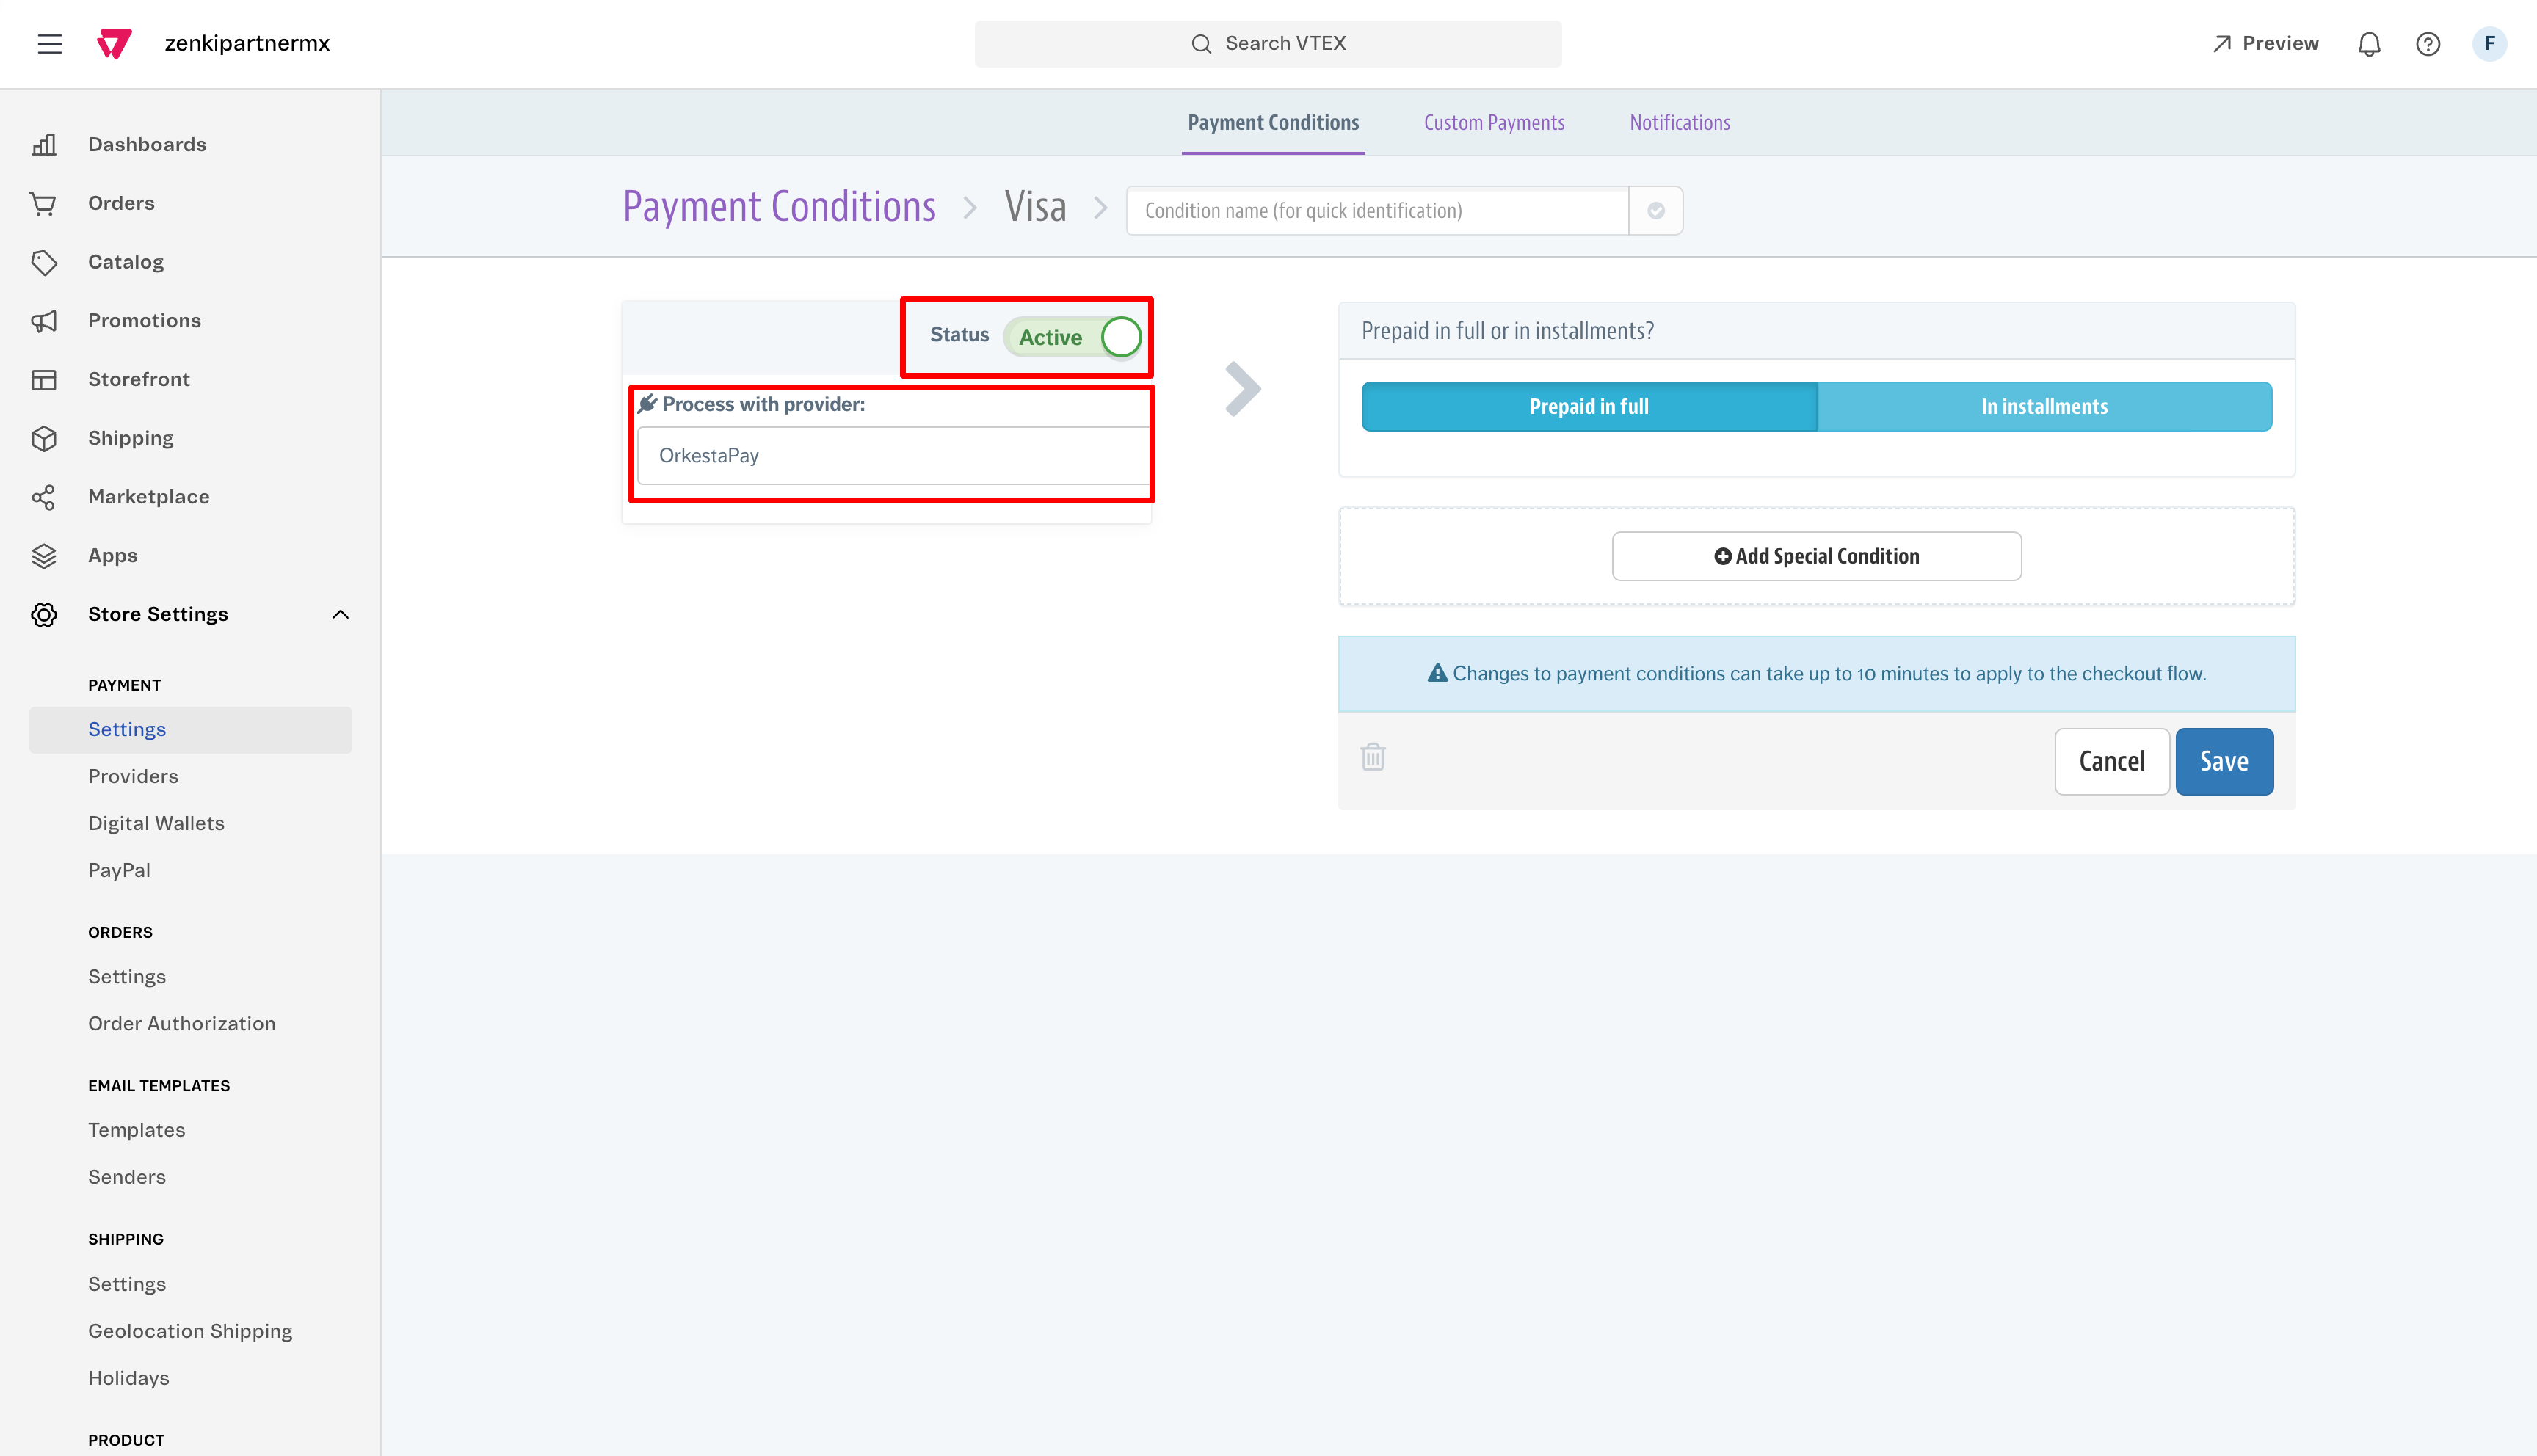
The following screen will be displayed where you must select the previously configured connector and enable the payment method by activating the Status toggle, then click the Save button.
Interest-free installments
OrkestaPay supports interest-free installments (MSI), meaning you can perform the configuration you consider necessary for your merchant without problems.
5 - Google Tag Manager (GTM) configuration
For your VTEX store to work correctly with OrkestaPay, an additional configuration is required that is managed through Google Tag Manager.
Once inside the Container and with the Workspace selected (the default one can work), you will need to configure a Trigger and a Tag.
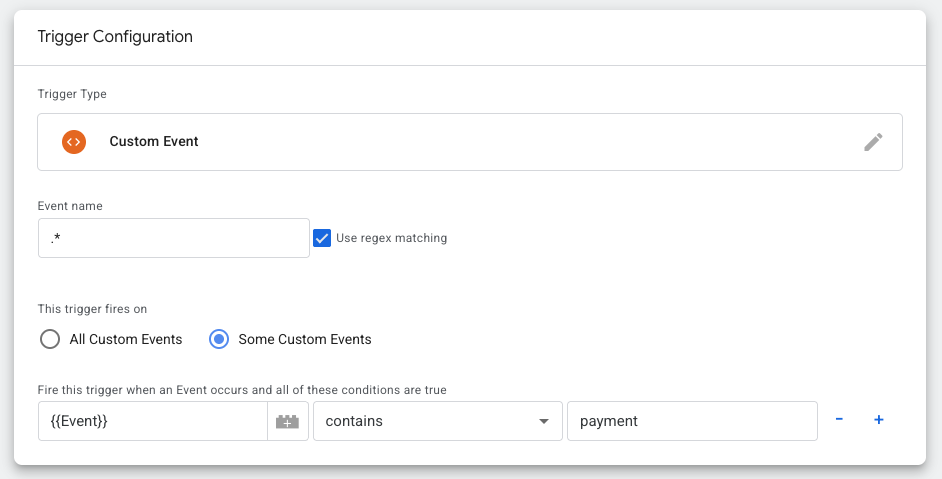
5.1 - Configure Trigger
- Trigger name: VTEX-OrkestaPay (can be any name)
- Trigger type: Custom event
- Event name: .* (check the regular expressions checkbox)
- This trigger fires on: Some custom events
- Conditions: Event contains payment
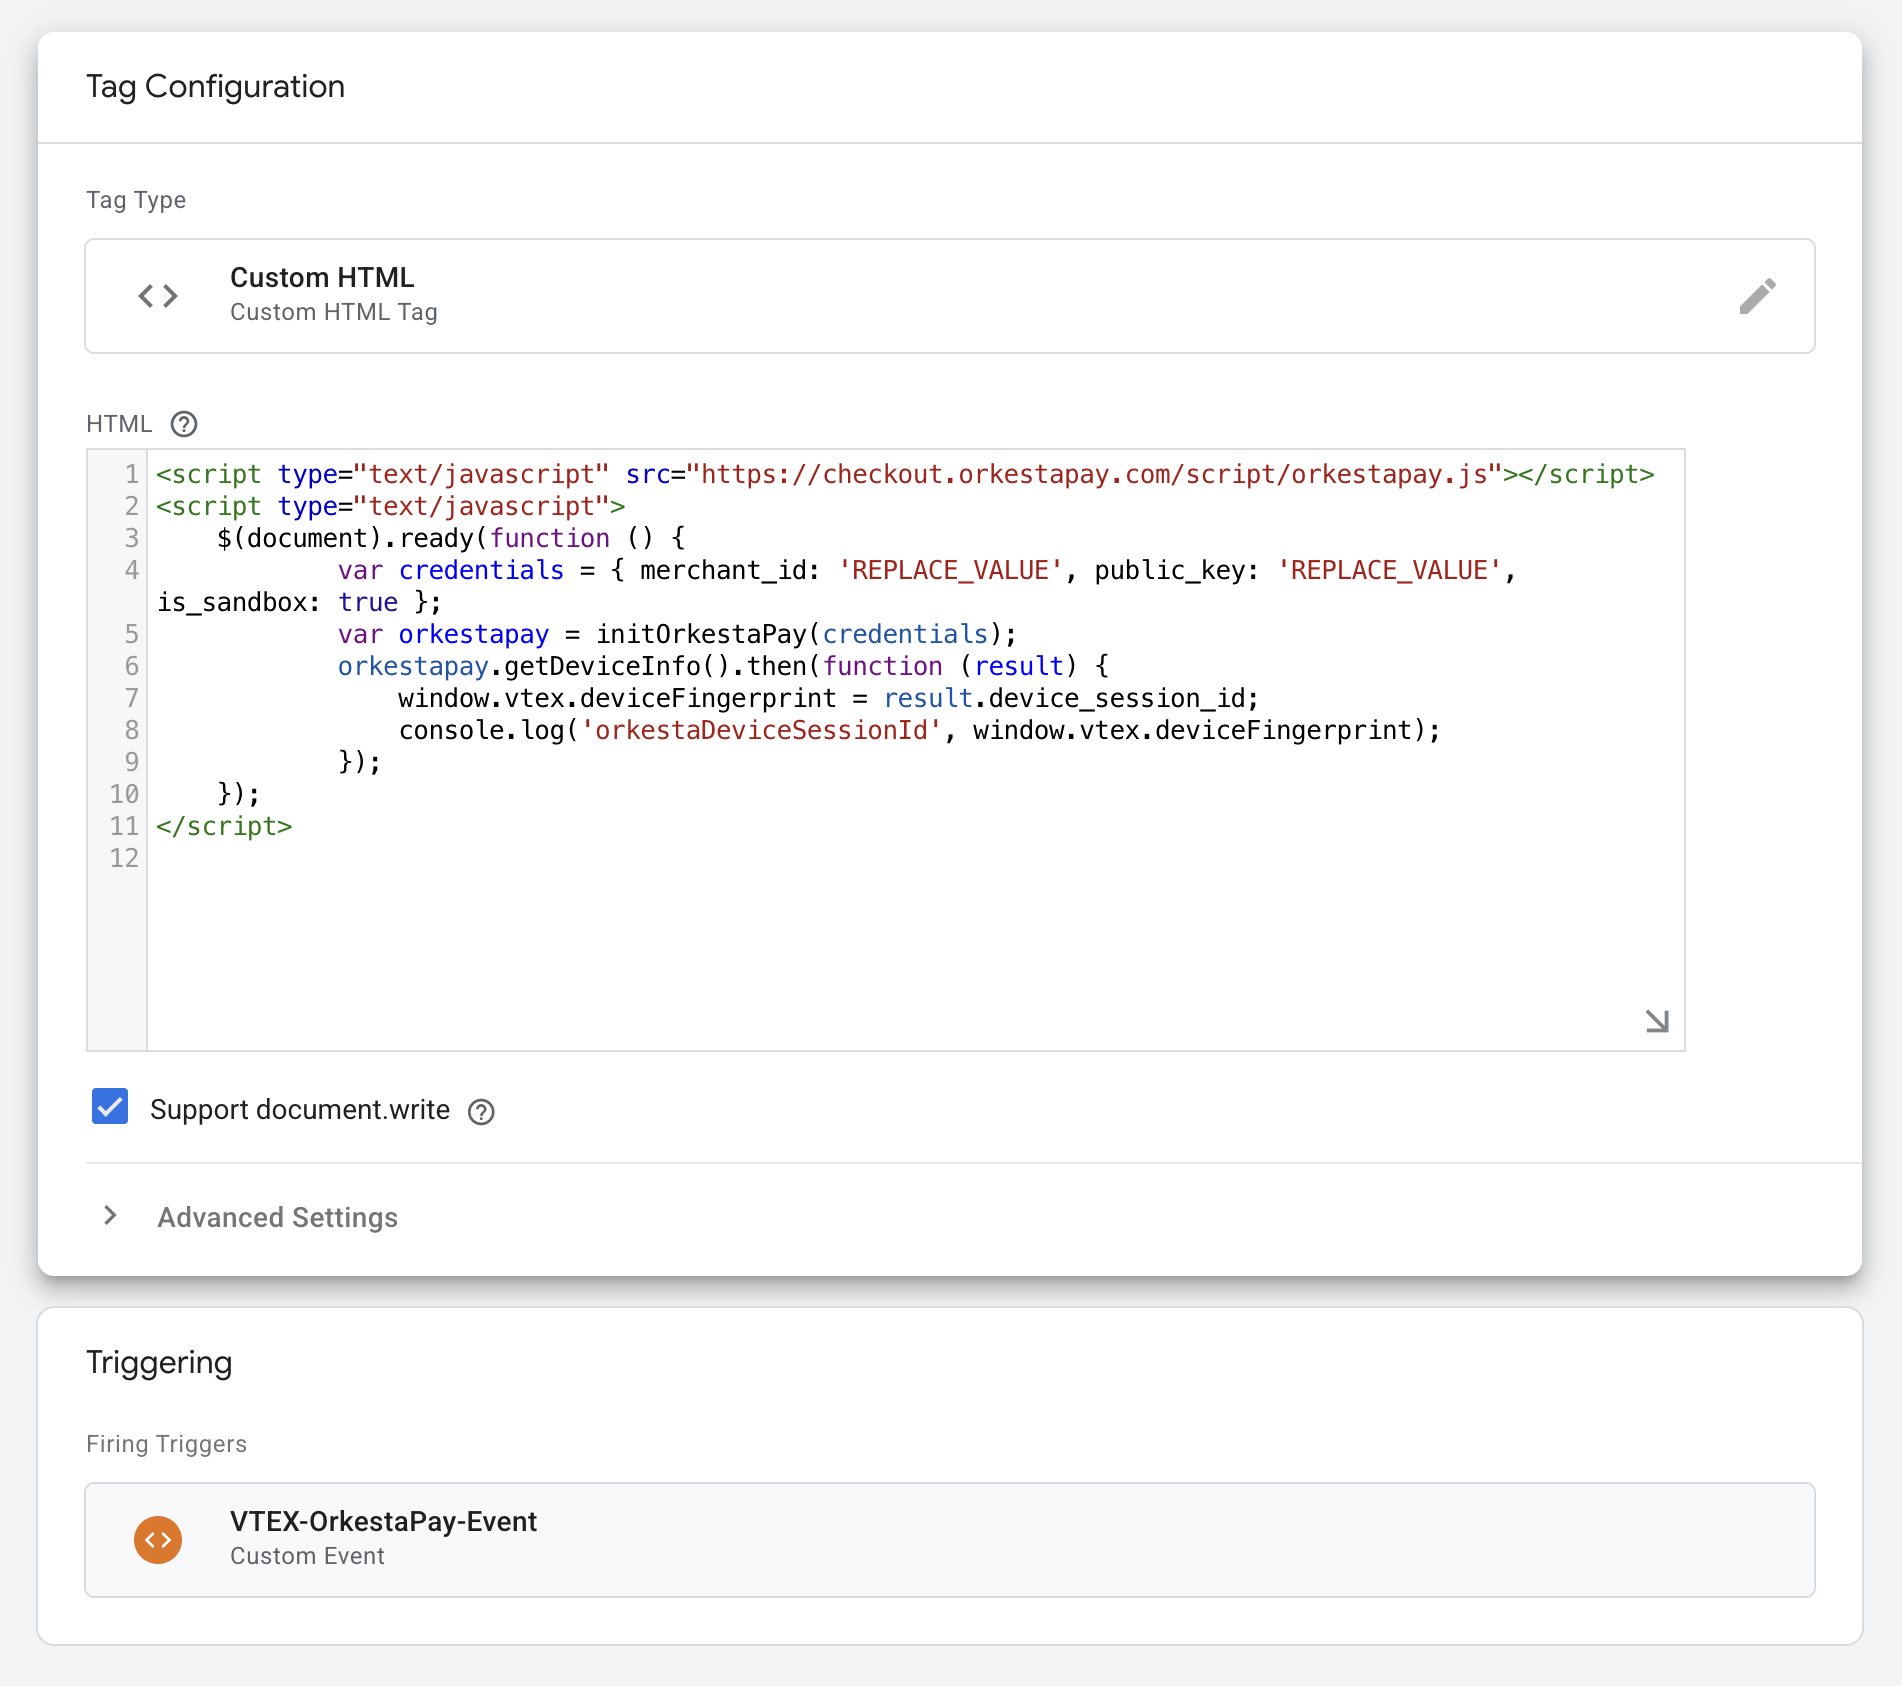
5.2 - Configure Tag
- Tag type: Custom HTML.
- Add the following script.
- Link Trigger: Name of the configured trigger.
<script type="text/javascript" src="https://checkout.orkestapay.com/script/orkestapay.js"></script>
<script type="text/javascript">
  $(document).ready(function () {
    var credentials = { merchant_id: "REPLACE_VALUE", public_key: "REPLACE_VALUE", is_sandbox: true };
    var orkestapay = initOrkestaPay(credentials);
    orkestapay.getDeviceInfo().then(function (result) {
      window.vtex.deviceFingerprint = result.device_session_id;
      console.log("orkestaDeviceFingerprint", window.vtex.deviceFingerprint);
    });
  });
</script>
IMPORTANT
You must replace the credentials values:
merchant_id,public_keyandis_sandbox
The result will look similar to this:
5.2 - Configure Google Tag Manager in VTEX
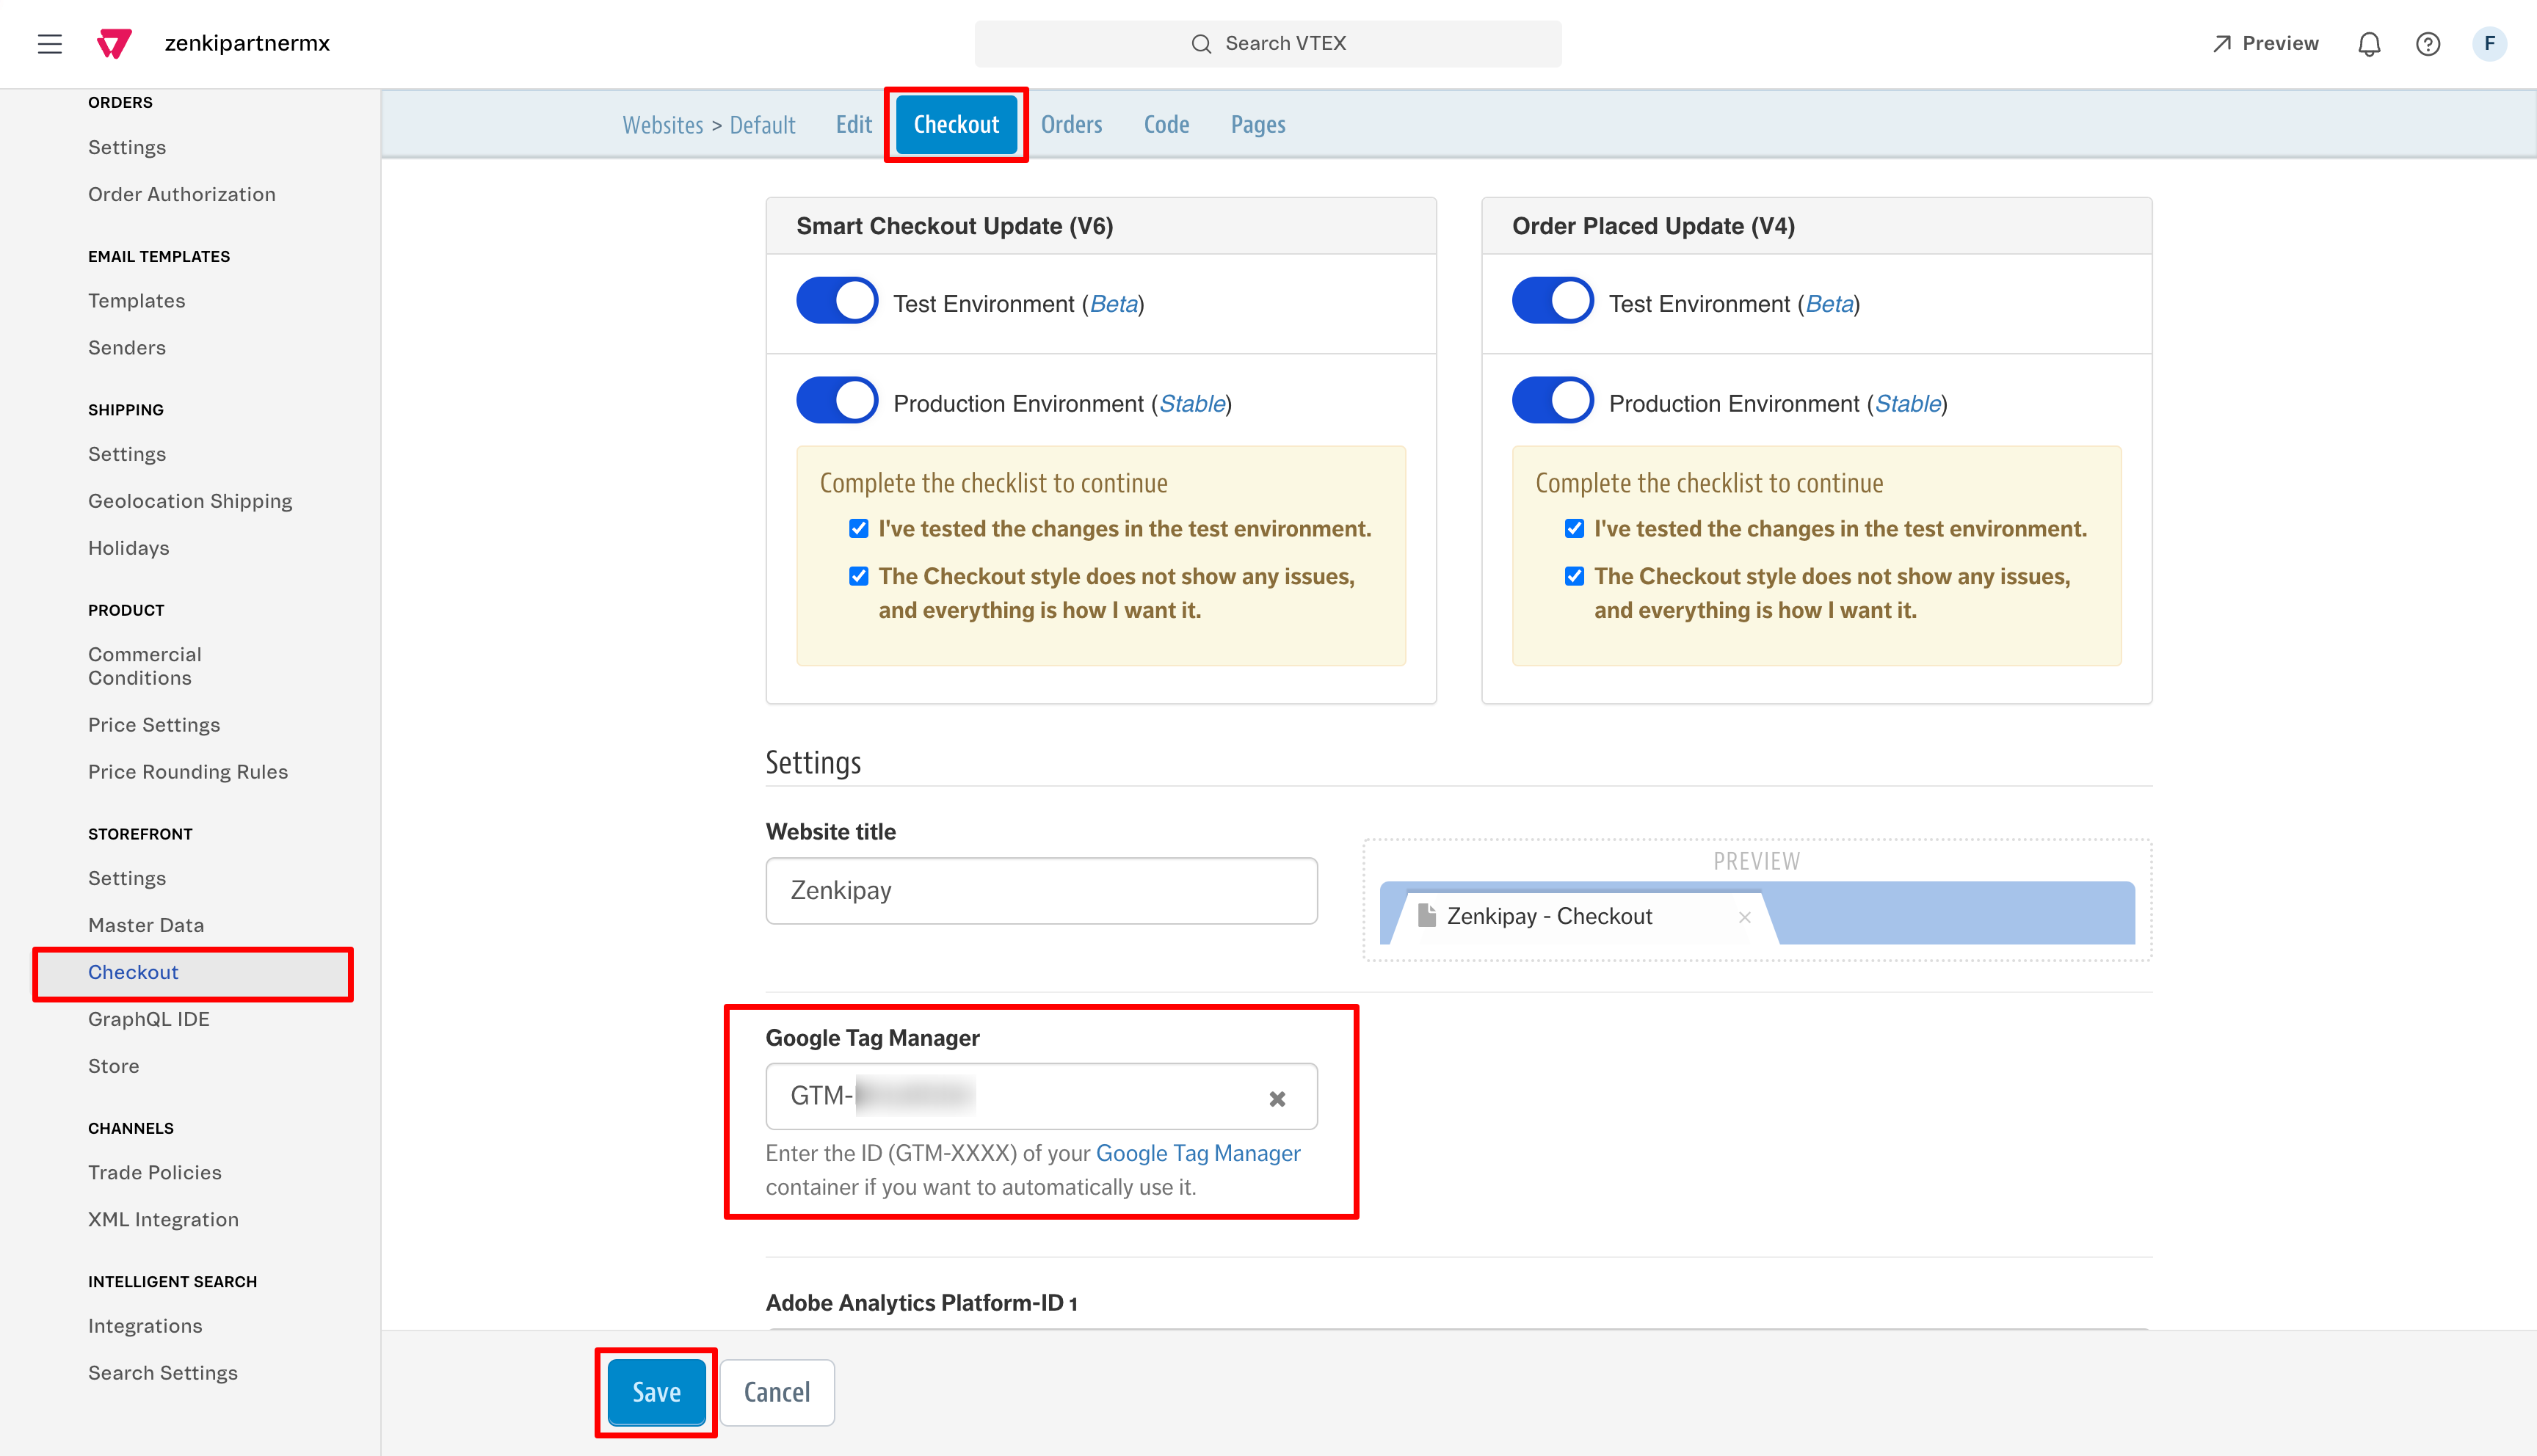
Once the configuration process in Google Tag Manager is complete, you will need to copy the GTM Container ID into your VTEX store by following these steps:
- Go to Storefront > Checkout
- Click the configure button (gear icon)
- On the next screen, select the Checkout tab
- Enter the GTM container ID (which has a format like GTM-XXXXXX)
- Click Save
6 - Go live
To start processing real payments, you must configure the production credentials in the VTEX payment connector we saw in step 3 and disable test mode.